


E-Scooter Repair Guide 2026: Fix Common E-Scooter Issues & Learn Essential Maintenance

Electric scooters are now a mainstream way to commute, run errands, and have fun. Whether you ride daily or occasionally, knowing basic repairs saves time, money, and stress. This E-Scooter Repair Guide 2026 walks you through the most common problems, step-by-step fixes, preventive maintenance, and safety notes so you can keep your ride running reliably.
Why routine care matters
Regular maintenance extends range and prevents expensive failures. Micromobility injuries and device-related emergencies rose sharply in recent years; emergency-department injuries related to e-scooters and e-bikes increased nearly 21% in 2022 compared with 2021, highlighting the importance of safe, well-maintained equipment.
Battery-related fires are a separate but serious risk when batteries are damaged, modified, or charged improperly—authorities and news outlets have repeatedly flagged rising incidents tied to poor batteries or unsafe charging. Handle batteries with care and follow manufacturer instructions.
How to use this E-Scooter Repair Guide 2026
This guide covers diagnosis, simple repairs you can do at home, when to seek a pro, and preventive tasks. Expect straightforward language, clear steps, and a short comparison table so you can decide what to tackle yourself and what to send to a shop.
Quick inspection checklist (do this before every ride)
Before you head out, glance over the scooter: check tire pressure and tread, test brakes, listen for unusual motor sounds, ensure lights work, and confirm the deck is dry and free of debris. Doing these checks avoids many common roadside stops. For regulatory and safety context on common crash causes (like poor pavement), see guidance from federal road-safety authorities.
Common problems and how to fix them
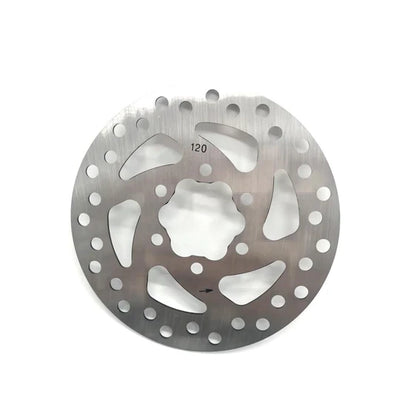
1. Flat tires or punctures — most frequent roadside issue
Tires vary by model: air (pneumatic) tires give better comfort but puncture; solid tires avoid flats but can transmit more vibration. To fix a puncture with a tubeed tire, remove the wheel, separate the tire bead, replace or patch the tube, then remount and inflate to recommended pressure. If you prefer hands-on video guidance, many brands and third-party channels provide step-by-step tutorials that match the procedures below.
2. Weak range or sudden range loss
Range decline can come from battery aging, cold temperatures, riding behavior, or a damaged battery pack. First check for software warnings on the display, then inspect for battery swelling, loose connectors, or corrosion. If cells are swollen, do not ride and seek professional battery service or replacement—battery repairs are a risk area. Use original manufacturer parts where possible. For guidance on cleaning and charging best practices, consult reputable brand manuals.
3. Brake adjustment and unwanted noise
If braking feels soft or noisy, most mechanical disc or drum brakes can be adjusted by aligning calipers, tightening pads, or truing rotors. Hydraulic systems need bleed and seal checks and are best handled by a trained technician if they leak. Regular brake checks are essential for rider safety.
4. Motor hum, stuttering, or sudden power loss
Hub motors can make noise if bearings wear or if foreign objects lodge near the axle. First, rule out loose bolts and check wiring to the motor controller. If the controller reports an error code, consult your manual or manufacturer's support channels. Avoid opening sealed components unless you’re experienced—controllers and motors can contain high-voltage parts.
5. Display errors and electrical gremlins
Corroded connectors and moisture ingress cause most display or sensor failures. Carefully open the clamp or deck panels (power off first), dry connectors, and apply dielectric grease to prevent corrosion. Replace damaged connectors rather than jury-rigging them.
Simple maintenance schedule that works
Daily: quick visual check of tires, brakes, and lights.
Weekly: tighten visible bolts, clean deck and stem, inspect brake pads.
Monthly: check battery connections, inspect wiring, verify tire pressure and tread.
Seasonally (or every 3–6 months): full safety check, including torque of axle nuts and brake bleed if hydraulic.
Below is a short comparison table to help prioritize repairs.
| Problem | DIY-friendly? | Typical time |
|---|---|---|
| Flat tube replacement | Yes | 30–90 minutes |
| Tire replacement (solid/heavy wheels) | Moderate | 45–120 minutes |
| Brake pad adjustment | Yes | 15–45 minutes |
| Battery replacement | No (safety) | Varied |
| Controller/motor faults | No (diagnostic tools) | Varied |
Tools and parts you should have at home
Keep a compact toolkit: hex keys, adjustable wrench, tire levers, pump, patch kit, multimeter, electrical tape, and a small parts tray for screws. For batteries and high-voltage components, always rely on certified replacements or authorized service centers rather than improvised parts.
When to stop and call a professional
If you see battery swelling, smell burning from the battery or controller, find leaking hydraulic fluid, or cannot safely isolate an electrical fault, stop riding and consult a qualified technician. Brands often provide support centers and repair networks; for model-specific guides and official instructions, refer to manufacturer resources and reputable service centers. Many brands also offer official how-to and troubleshooting content, which is useful for learning brand-specific procedures.
Practical tips to extend scooter life
Charge at room temperature and avoid extreme heat or cold. Avoid overloading the scooter beyond its rated capacity. Keep firmware up to date if your scooter supports OTA updates. Avoid cheap third-party battery packs—use certified replacements. These simple habits reduce many battery and electrical failures reported by safety organizations and news investigations.
Resources and where to learn more
For repair walk-throughs and visual demos, brand support pages and community videos are invaluable. The competitor article you referenced offers practical tips and is a good companion resource. For broader safety data and regulatory context, consult the U.S. Consumer Product Safety Commission and federal roadway safety guidance.
Recommended parts & shop links
If you’re shopping for replacement parts or want a new reliable model, check trusted vendors. For example, Kaabo USA lists performance models and parts on their main site and product pages—use those pages for official specs and compatible parts. See Kaabo USA and the Mantis product page for examples of build and parts choices. https://www.kaabousa.com/ and https://www.kaabousa.com/products/mantis-king-gt
Final tips for safe DIY repairs
Work in a clean, dry, well-lit area and disconnect the battery before opening panels. Keep a fire extinguisher rated for electrical fires nearby when working with batteries. Label screws and small parts to avoid reassembly errors. And when in doubt, pause and consult official support—DIY saves money but safety comes first.
Smart checklist before resale or inspection
Before selling or taking your scooter in for warranty work, reset trip logs if applicable, document maintenance done, note any replaced parts, and take a few clear photos. This helps with resale value and warranty claims.
Regular e-scooter maintenance keeps your ride smooth, and the same goes for online stores. Many businesses use Shopify maintenance service to keep their stores running efficiently.
FAQs — Helpful answers that use the focus keyword
Q1: How long will a typical battery last if I follow this E-Scooter Repair Guide 2026?
A1: With proper charging, storage, and not exceeding rated cycles, typical lithium scooter batteries last 2–4 years; following the E-Scooter Repair Guide 2026’s battery care tips will maximize usable life.
Q2: Can I replace a hub motor myself following steps in the E-Scooter Repair Guide 2026?
A2: Replacing a hub motor is mechanically possible for experienced DIYers but involves electrical reconnection; if you’re unsure, follow the E-Scooter Repair Guide 2026 recommendation to use a trained technician.
Q3: Does the E-Scooter Repair Guide 2026 cover tire choices and when to switch to solid tires?
A3: Yes—the guide explains pros and cons of pneumatic vs. solid tires and suggests replacement timetables based on ride conditions, following the E-Scooter Repair Guide 2026 advice.
Q4: Where can I find official parts compatible with my scooter as advised in the E-Scooter Repair Guide 2026?
A4: Start with the manufacturer’s official store or authorized dealers; the E-Scooter Repair Guide 2026 recommends original parts pages (for example, Kaabo USA) for compatibility and safety.
Keep your ride ready
The E-Scooter Repair Guide 2026 shows the small checks that prevent big problems. Follow the simple inspections, understand when to DIY, and treat batteries with respect to ride safer for longer.
 https://www.kaabousa.com